GINA AHREN'S WALL ART
This is a fun, easy and very satisfying project for August with my take on an eye-catching piece of WALL ART.

Here is what you will need:
*Gina's Digital Background Bundle
*Gina Ahrens Book (some pages photocopied)
*Ginas Ahrens Stamp set No.3
*Recycled cardboard
(To cut into smaller shapes
and a large piece as a backing board)
*Gina's Downladable Words
*White & Black gesso
*Double sided tape, thin and dimensional
*Glue stick
*Scissors
*Distressing tool
*Black Ink Pad
*Sharpie fine point Marker
Let's get this project started!
The recycled cardboard needs to be cut into small square or rectangular shapes. The size really depends on your own preference. I cut mine to about an inch by three inches and two inches by two inches and then some at two by three inches. You need to cut quite a few to fill your large piece of backing board. When cut, I gave each piece a light brayer of gesso which will add a bit of grip when it comes to gluing down your images.
Once the gesso was dry on all pieces I went through Gina's Book and photocopied out a few pages of her doodles, background images and also some of the text and I also printed out a background from her online store...the digital Background bundle. I also made some backgrounds using Gina's stamps, which I stamped onto tissue paper. Then I went through and adhered pieces of Ginas images, text, stamped tissue paper on to my small pieces of cardboard whcih gave me some really great backgrounds for the start of the art cards.

The next step in this project is to go around each edge of the shapes and distress the edges and also give them a rub with a black ink pad, this gives them an added interest when they all get placed together on the backing board. The second phase in this project is to go through all the art cards again and place your focal image or as in a few cases, I just glued a word onto the card. I found that having a small piece of Ginas already made art on the card was complete within itself.

When I had completed all the small pieces of art, I gave my large backing board a good coat of black gesso and then proceeded to work out where and how I wanted to place my art cards on it. Some of the art cards had dimensional tape on them and others had the thin double-sided tape and this also gave the completed piece of Wall Art an added bit of dimension and interest as a piece as a whole. Just to finish off the piece I edged the shown edges with a small amount of copper paint using a brush.
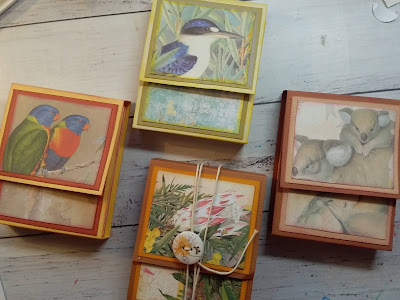
I had a couple of small images left over so I decided to make them into small individual pieces of Wall Art.


You can see the whole process in the following video:
Thank you and I hope you all enjoy making one for yourself to hang in your crafty space!


Comments
Post a Comment